
Učinkovito proizvodnja visoko točnih utisnutih komponenti zahtijeva pažljivo uklanjanje pогrešaka alata. Kada komadi izlaze iz tolerancije, imaju vidljive nedostatke ili prerano trošenje složenih alata, potrebno je slijediti sustavniji proces. Ovo su osnovne napomene za precizno uklanjanje pогrešaka alata:
1.Točno definirajte problem (Dijagnosticirajte prije liječenja):
Mjerite pažljivo: Ne pouzdajte se samo u vizualni pregled. Mjerite dimenzionalna odstupanja koristeći precizne instrumente, kalibrirane pomoću blokova mjerila, mikrometara, optičkih komparatora, CMM uređaja. Točno odredite mjesto i iznos dijela van specifikacije (duljina, lokacija rupe, kut savijanja, ravnoteža).
Dokumentirajte nedostatke: Sve vrste nedostataka (oštrice, zalihe, ogrebotine, pukotine, nabori, uvijanje, pogrešno hranjenje) treba grupirati i fotografirati. Zabilježite mjesto i učestalost (svaki hod, povremeno, određena lokacija trake).
U skladu s člankom 3. stavkom 2. točkom (a) ovog članka, za proizvodnju proizvoda koji se upotrebljavaju u proizvodnji materijala za proizvodnju proizvoda za proizvodnju proizvoda za proizvodnju proizvoda za proizvodnju proizvoda za proizvodnju proizvoda za proizvodnju proizvoda za proizvodnju proizvoda za proizvodnju proizvoda za proizvodnju proizvoda za proizvodnju proizvoda za proizvodnju proizvoda za proizvod Provjerite jesu li u pitanju problemi s transfuzijom, pogrešno uzimanje hrane ili nosioci.
2.Počni jednostavno i sustavno (pravilo od 80%):
Prvo materijal: predmetna specifikacija materijala (vrsta, temperament, debljina, tvrdoća, premaz) prema potrebama. Mjerenje s više mjeračkih točaka debljina je često izvor ulazne varijacije kotulje. U slučaju da se ne primjenjuje, potrebno je da se u skladu s tim postupkom i u skladu s tim postupkom, upotrijebi i upotrijebi u skladu s člankom 6. stavkom 2.
U slučaju da se ne primjenjuje primjena ovog standarda, mora se provjeriti da li je testirana metoda primjene primjene. Provjerite kapacitet tonaže, visinu zatvaranja i paralelnost. Ako je to moguće, provjerite da li je vrijeme ishrane točno i da li se može ponoviti.
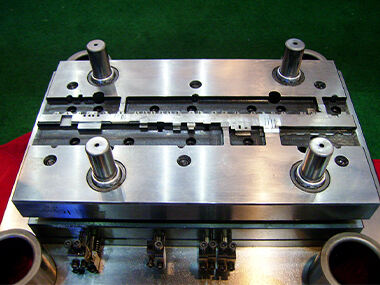
Komponente i obrabi: Provjerite kritične komponente obrabe kao što su oštećenje, lomljenje i oštećenje: udarci, gumbovi obrabe, vodila/gumbovi, opruge (provjerite slobodnu dužinu i pritisak), podizatelji, piloti. U slučaju da se ne primijenjuje, ispitati se može li se upotrebljavati i druga metoda.
3.Analiza progresije i vremenskog rasporeda (Ples metalnog toka):
Raspored trake i angažiranje vodećih pinova: Provjerite je li raspored trake ispravan kako ne bi dolazilo do zastoja. Provjerite da li vodeći pinovi potpuno ulaze u vodeće rupe prije oblikovanja/rezanja. Nedovoljno angažiranje vodećeg pinova dovodi do pogrešne pozicije i problema s rezanjem.
Sekvenciranje i interferencija: Pažljivo provjeravajte svaku traku pojedinačno. Provjerite bilo koju točku gdje dijelovi mogu dolaziti u kontakt s trakom u pogrešnom trenutku ili se sudarati međusobno tijekom ciklusa preše. Trošenje, deformacije i lom imaju nekoliko uobičajenih uzroka vezanih uz vremenske pogreške.
Kontrola kretanja materijala: Tok metala strogo se kontrolira kada je u pitanju precizno oblikovanje. Provjerite učinkovitost vučnih rebara, pritisnih ploča i stezača. Kada nema dovoljno pritiska pojavit će se nabori, a kada je pritisak prejak pojavit će se pukotine.
4.Fokusiranje na kritične zone za preciznost:
Razmaci: Razlike u reznom/oblikovnom razmaku koje se razlikuju za sekunde imaju katastrofalne posljedice na kvalitetu dijelova i vijek trajanja alata. Ponovno provjerite tolerancije, posebno one na važnim razinama tolerancija, uzimajući u obzir debljinu i površinsko otpuštanje materijala. Potražite dokaze o prevelikom razmaku (veliki oštrina, zaokretanje) ili premalom razmaku (sekundarni posmik, micanje, ubrzano trošenje).
Otpuštanje nakon savijanja: Precizni saviji imaju unaprijed postavljeno pretjerano savijanje kako bi se uzelo u obzir povlačenje materijala. Kada kutevi savijanja nisu jednoliki, provjerite razlike u svojstvima materijala, mazivu ili trošenju alata za oblikovanje. Često je potrebno fino prilagoditi kutove pretjeranog savijanja.
Kvaliteta površine i trenje: Oguljotine i trenje uništavaju proizvode ovisne o kvaliteti površine. Provjerite kvalitetu alata pomoću lupe s niskim uvećanjem ili binokularnog mikroskopa, isključujući sitne ogrebotine i/ili hrapavost ili nepotpuno poliranje. Provjerite je li materijal dobro tretiran na površini (nitriranje, prevlake poput DLC-a). Dovoljna podmazanost je ključna.
5. Dodatno podešavanje i dokumentacija:
Mala, kontrolirana podešavanja: Ne mijenjajte u velikoj količini odjednom ili napravite više promjena. Napravite samo jednu promjenu (npr. nešto povećajte tlak za oblikovanje, mikro-podesite visinu matrice, napravite malu promjenu vremena hranjenja) i procijenite učinak promjene tijekom nekoliko hoda.
Stabilnost procesa: Nakon najmanjih podešavanja, radite matricom dulje vrijeme. Zabilježite stvarne i stabilne parametre procesa (tonaža, duljina hranjenja, visina zatvaranja, postavke podmazivanja) na dokazano stabilnu postavku.
Dokumentirajte sve: Zapišite detaljno izvorni problem, inspekcijske izvještaje i prilagodbe, kao i konačno rješenje. Vrijednost ovog dnevnika je u naknadnim sesijama otklanjanja grešaka, kao i u planiranju preventivnog održavanja.
Preciznost u fokusu: Stanje da preciznost kod otklanjanja grešaka umire uzima dosta smirenosti, preciznog i metodičnog pristupa otklanjanju grešaka, kao i strpljenja i pažljivog promatranja. Bolje je započeti s osnovama, poput provjere materijala i jednostavnih postava, a zatim preći na analizu vrlo složenog taktiranja i jasnoće kako bi se brzo pronašla rješenja. Imajte na umu da preciznost u sustavu alata i preše ovisi o znanju i manipulaciji milijunima sitnih kontakata. Strogo vođena dokumentacija pretvara proces otklanjanja grešaka u osnovi u proaktivni, a ne reaktivni proces.